Farming is the quickest way to start earning Sil in Moonfrost. You buy seeds from the Vending Machine: Seeds, grow them on your farm and sell the harvest. Every crop runs on a real-time timer, so the right seed depends on how long you’ll be away from your fields.
How Farming Works
- Till the ground with a hoe. Seeds only go into tilled soil.
- Plant the seeds. Equip them and use them on a tilled patch.
- Water the crop with a watering can. A seed doesn’t grow at all until its soil is wet, and its timer starts once it’s both planted and watered.
- Wait for it to grow. Growth times are real minutes and seconds, and crops keep growing while you’re busy elsewhere. The timers do stop during cutscenes and on some menus.
- Harvest the grown crop, then sell the produce for Sil.
One watering is enough. Once a crop is in the ground, watering it keeps the soil wet until you harvest, so you don’t need to come back with the can. Rain does the job for you as well: light and heavy rain water every crop on the map. Watering a crop again never restarts its timer, because it keeps counting from the first watering.
Bare soil is a different story. A hoed patch goes back to plain ground after 48 minutes if you don’t plant anything in it, and watering an empty patch lasts 72 minutes. You can water first and plant afterwards, as long as you plant before either one wears off.
After the last harvest, the patch returns to untilled ground. Hoe it again before you replant.
Buying Seeds
Seeds come from the Vending Machine: Seeds, and you pay for them in Sil. There are two of them: one outside Walter’s store in the Village, and one on your farm near the well, which appears once Walter has given you his farming tips in Learning the Ropes. Both sell the same seeds. Walter adds new seeds to the machines as you work through his quests, starting with Radish Seeds when he first shows you how to farm. None of them has a level requirement. The table lists each seed with the quest that puts it in the machine.
| Seeds | Price | Unlocked in | |
|---|---|---|---|
 | Radish Seeds | 2 Sil | Learning the Ropes |
 | Carrot Seeds | 5 Sil | Building a Home |
 | Turnip Seeds | 10 Sil | Cooking 101 |
 | Broccoli Seeds | 13 Sil | Farming Away |
 | Asparagus Seeds | 15 Sil | Refining your Skills |
 | Corn Seeds | 25 Sil | Farming Away |
 | Potato Seeds | 25 Sil | Fixing Lemmon’s |
 | Onion Seeds | 30 Sil | Farming Away |
 | Rhubarb Seeds | 30 Sil | A Second Chance |
 | Tomato Seeds | 80 Sil | Farming Away |
Potato Seeds only arrive once you’re well into restoring Walter’s store in Fixing Lemmon’s.
The machine on your farm also takes back seeds you bought by mistake. Before you close it, you can refund anything you bought during that visit for the full price, as long as the seeds are still in your inventory.
Crop Overview
How to read the table:
- Seed price is the cost of one seed at the Vending Machine.
- Growth time is the real time from planting (or from the first watering, if that comes later) until the crop is ready.
- Harvests is how many times one seed can be picked.
- Yield per harvest is how many pieces of produce each harvest drops.
- Avg. sale per harvest is what one harvest sells for on average with Stone tools, counting the occasional higher-quality crop.
| Crop | Seed price | Growth time | Harvests | Yield per harvest | Avg. sale per harvest | |
|---|---|---|---|---|---|---|
 | Radish | 2 Sil | 40 sec | 1 | 1 | 31 Sil |
 | Carrot | 5 Sil | 2 min | 1 | 1 | 51 Sil |
 | Turnip | 10 Sil | 4 min | 1 | 1 | 92 Sil |
 | Asparagus | 15 Sil | 5 min | 1 | 2–3 | 86 Sil |
 | Corn | 25 Sil | 7 min 20 sec | 1 | 1 | 112 Sil |
 | Onion | 30 Sil | 7 min 20 sec | 1 | 1 | 133 Sil |
 | Potato | 25 Sil | 12 min | 1 | 1 | 296 Sil |
 | Rhubarb | 30 Sil | 12 min | 1 | 1 | 358 Sil |
 | Broccoli | 13 Sil | 15 min | 1 | 1 | 235 Sil |
 | Tomato | 80 Sil | 20 min | 3 (regrows in 18 min) | 2–3 | 196 Sil |
Of these crops, only Tomato regrows. After you pick it, the plant drops back to an earlier stage and fruits again 18 minutes later, for three harvests in total before the patch resets.
Growth Stages
Each crop changes shape as it grows, so you can spot the patches that are close to ready from across the field. The last picture in each row is the crop once you can harvest it, with its full growth time.
Radish



 Ready in 40 sec
Carrot



 Ready in 2 min
Turnip




 Ready in 4 min
Asparagus


 Ready in 5 min
Corn




 Ready in 7 min 20 sec
Onion



 Ready in 7 min 20 sec
Potato




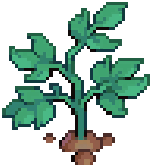 Ready in 12 min
Rhubarb




 Ready in 12 min
Broccoli




 Ready in 15 min
Tomato




 Ready in 20 min
Best Crops for Sil
Choose by how often you can tend the farm.
- Radish earns the most per minute of growing time: about 29 Sil of profit every 40 seconds, or roughly 43 Sil per minute for each seed. You have to till, plant and water again after every harvest, so it only pays off while you’re standing in your field. Carrot and Turnip work the same way at about 20 to 23 Sil per minute.
- Rhubarb is the best crop to leave growing. A 30 Sil seed takes 12 minutes and sells for about 358 Sil on average, roughly 27 Sil per minute. Potato is close behind: a 25 Sil seed averages about 296 Sil in the same 12 minutes.
- Tomato earns the most from a single seed. Three harvests of two or three tomatoes each are worth about 588 Sil on average for an 80 Sil seed. The three harvests take 56 minutes in all (20 to grow, then 18 for each regrow), only about 9 Sil per minute, so plant Tomatoes when you’ll be away from the farm for an hour.
- Asparagus, Onion, Broccoli and Corn land between 12 and 15 Sil per minute. Grow a few for the Crops collection, but don’t fill your fields with them. Corn is the exception if you’re after golden crops (see below).
Crop Quality and Golden Crops
Every harvest rolls a quality: Common, Uncommon, Rare, Epic or Mythic. A Mythic roll gives you the crop’s golden version, such as a Golden Carrot, which sells for the most. With Stone tools, about one harvest in ten comes up better than Common, and golden crops are very rare.
Corn breaks that pattern. About half of all Corn harvests come up better than Common, and roughly 1 in 260 is a Golden Corn, more than four times the golden chance of any other crop.
The table lists what one piece sells for at each quality, then the golden version and your chance of getting it on each harvest with Stone tools.
| Crop | Common | Uncommon | Rare | Epic | Golden version | Golden chance | |
|---|---|---|---|---|---|---|---|
| Radish | 30 | 36 | 45 | 60 |  Golden Radish: 60 | 0.072% |
| Carrot | 50 | 60 | 75 | 100 |  Golden Carrot: 130 | 0.068% |
| Turnip | 90 | 108 | 135 | 180 |  Golden Turnip: 200 | 0.081% |
| Asparagus | 35 | 42 | 53 | 70 |  Golden Asparagus: 80 | 0.035% |
| Corn | 100 | 120 | 150 | 200 |  Golden Corn: 220 | 0.38% |
| Onion | 130 | 156 | 195 | 440 |  Golden Onion: 480 | 0.082% |
| Potato | 290 | 348 | 435 | 580 |  Golden Potato: 600 | 0.087% |
| Rhubarb | 350 | 420 | 525 | 700 |  Golden Rhubarb: 750 | 0.082% |
| Broccoli | 230 | 276 | 345 | 460 |  Golden Broccoli: 500 | 0.080% |
| Tomato | 80 | 96 | 120 | 160 |  Golden Tomato: 200 | 0.034% |
A golden Asparagus or Tomato harvest also drops two Epic pieces alongside the golden one.
Better Hoes and Watering Cans
Upgrade both farming tools as soon as you can. Each tier past Stone tilts every harvest roll toward Uncommon, Rare and Epic crops, and the hoe’s bonus and the can’s bonus stack on the same patch. Walter hands you the Copper recipes in Cooking 101. For Silver and Gold, visit the FHA Vending Machine in the village: it gives you the Silver recipe for your Copper tool plus 1,000 Sil, and the Gold recipe for your Silver tool plus 5,000 Sil. Craft the new tool at the Tools Workbench afterwards. Each tier gives a bigger boost than the one before.
The machine keeps the tool you hand in, so have the bar and wood for the new one ready before you trade.
Better tools don’t help with golden crops. Their boost only reaches Uncommon, Rare and Epic, so those qualities crowd out the golden roll and golden crops turn up less often. If you’re hunting golden crops, till and water those patches with Stone tools. Asparagus and Tomato are the exception: their golden harvest includes two Epic pieces, so it gets the Epic boost too.
Rain waters your crops but doesn’t add a better can’s quality bonus. Water new plantings with your best can straight away, even on rainy days. Watering after the rain costs you no growing time.
| Tool | Recipe from | Materials | Quality boost | |
|---|---|---|---|---|
 | Stone Hoe | Learning the Ropes | 4 Birchwood, 2 Stone | None (base soil) |
 | Copper Hoe | Cooking 101 | 10 Birchwood, 1 Copper Bar | Small |
 | Silver Hoe | FHA Vending Machine: 1 Copper Hoe, 1,000 Sil | 10 Ashwood, 1 Silver Bar | Large |
 | Gold Hoe | FHA Vending Machine: 1 Silver Hoe, 5,000 Sil | 10 Pinewood, 1 Gold Bar | Largest |
 | Stone Watering Can | Learning the Ropes | 5 Stone | None (base soil) |
 | Copper Watering Can | Cooking 101 | 10 Birchwood, 1 Copper Bar | Small |
 | Silver Watering Can | FHA Vending Machine: 1 Copper Watering Can, 1,000 Sil | 10 Ashwood, 1 Silver Bar | Large |
 | Gold Watering Can | FHA Vending Machine: 1 Silver Watering Can, 5,000 Sil | 10 Pinewood, 1 Gold Bar | Largest |
Crop Collections
The Collection Album tracks every crop you’ve owned. An entry counts the first time that item lands in your inventory. The Crops collection has 42 entries: the Common, Uncommon, Rare and Epic versions of all ten crops, plus two crops that no seed in the machine grows. Golden crops fill a separate Golden Crops collection with one entry for each of the ten golden crops, and Corn is the easiest one to tick off.